
How to Make Rolling Credits in Premiere Pro
Create and format rolling credits with Premiere Pro’s current Properties workflow, then learn how to manage long lists, revisions, and professional delivery.

Rolling credits are straightforward to create in Adobe Premiere Pro when the list is short and the layout is simple. The work becomes more demanding when a production has hundreds of names, multiple departments, paired role-and-name columns, or late approval changes.
This guide shows you how to prepare a clean credit list, build and format a rolling graphic with Premiere’s current Properties workflow, control its speed, and troubleshoot common problems. It also explains when it may be more efficient to prepare the roll in ScrollX and bring the finished output back into your editing or finishing timeline.
Quick answer: Can Premiere Pro make rolling credits?
Yes. Create a text graphic, select the graphic clip in the timeline, open the Properties panel, and enable Roll. Premiere Pro works well for short or relatively simple credit sequences. Large lists, frequent revisions, multiple departments, and spreadsheet-based approvals usually require more manual list and layout management. ScrollX is a professional end-credit creation platform designed for those structured, revision-heavy workflows; it does not replace Premiere as the editing and finishing system.
Before You Start: Prepare Your Credit List
Do not begin by pasting the first credit list you receive into a timeline. The text may already look complete while still containing misspelled names, outdated roles, duplicate entries, or departments in the wrong sequence. Fixing those problems after the roll has been styled can create unnecessary layout and timing work.
Start with one authoritative source that records:
- each person’s approved screen name;
- the exact role or title that should appear;
- the department or section the credit belongs to;
- the approved sequence of cards, departments, acknowledgements, music, and legal lines;
- the owner responsible for final approval; and
- any unresolved notes or late changes.
The correct order can vary by production, contracts, guild requirements, distributor requirements, and negotiated placement. Use the film credits order guide as a practical organizing reference, then confirm the final sequence with the production’s authorized credit owner. For a structured starting file, download the free end credits spreadsheet template.
It also helps to decide which material should appear as a static card and which should be included in the continuous roll. Key cast, principal creatives, production companies, and contractual credits may require special placement. Do not assume that every line belongs in one long text crawl.
How to Make Rolling Credits in Premiere Pro
The following workflow uses terminology verified in Adobe’s current Premiere documentation. Interface locations can change between releases, so confirm the panel names against the version installed in your edit suite.
1. Create or open the finishing sequence
Open the sequence that will contain the final credit roll and place the playhead where the rolling credits should begin. Confirm the sequence frame rate, raster, and delivery format before you judge motion or readability. A roll that appears acceptable in one preview context may behave differently after conversion or delivery.
2. Add a text graphic
Select the Type tool from the toolbar, then type in the Program Monitor. Premiere creates a graphic clip for the title. You can paste an approved block of credit text, but very long lists are usually easier to check in smaller, clearly organized sections before they are combined.
Adobe’s current title workflow also allows you to right-click the title in the Program Monitor and choose Edit Properties to open the Properties panel. Use that panel to set the font, color, appearance, and alignment.
3. Arrange the credit block before animating it
Create a hierarchy that remains clear while moving:
- separate department headings from names and roles;
- use consistent spacing between departments;
- keep equivalent roles aligned consistently;
- check the longest name and longest role, not only the shortest examples; and
- avoid mixing tabs, spaces, and manual line breaks in ways that will collapse after a revision.
If the production uses paired role-and-name columns, build and test the widest realistic pair before formatting the entire list. A narrow title can look clean until a long name forces the columns together.
4. Select the graphic clip, not an individual text layer
This detail matters in current Premiere versions. Make sure text or graphic layers are deselected in the Program Monitor. If one or more layers are selected, Adobe notes that the Roll option will not be visible.
Select the graphic clip in the timeline, then navigate to the Properties panel.
5. Enable Roll
In the Properties panel, select the checkbox next to Roll. Premiere changes the graphic into a vertically moving title or credit roll. Adobe describes a translucent blue scrollbar in the Program Monitor that provides a document view, allowing you to move through the credit text while editing without moving the sequence playhead to every section.
Use the available options to specify whether the roll should start or end offscreen. The right choice depends on the editorial transition. A roll can begin after a static card, over picture, or from a clean background, and it may finish before another card or continue fully out of frame.
6. Adjust the roll timing controls
Premiere’s current Roll controls include:
- Preroll — time before the roll begins moving;
- Postroll — time after the movement finishes;
- Ease in — time used to transition into the movement;
- Ease out — time used to transition out of the movement; and
- Soften — an option Adobe provides to smooth the rolling motion.
Set these values according to the intended transition and review the result at normal playback speed. Do not add an ease automatically just because the control exists. Some credit sequences call for continuous, steady movement; others intentionally pause or soften around the beginning and end.
7. Set the graphic duration
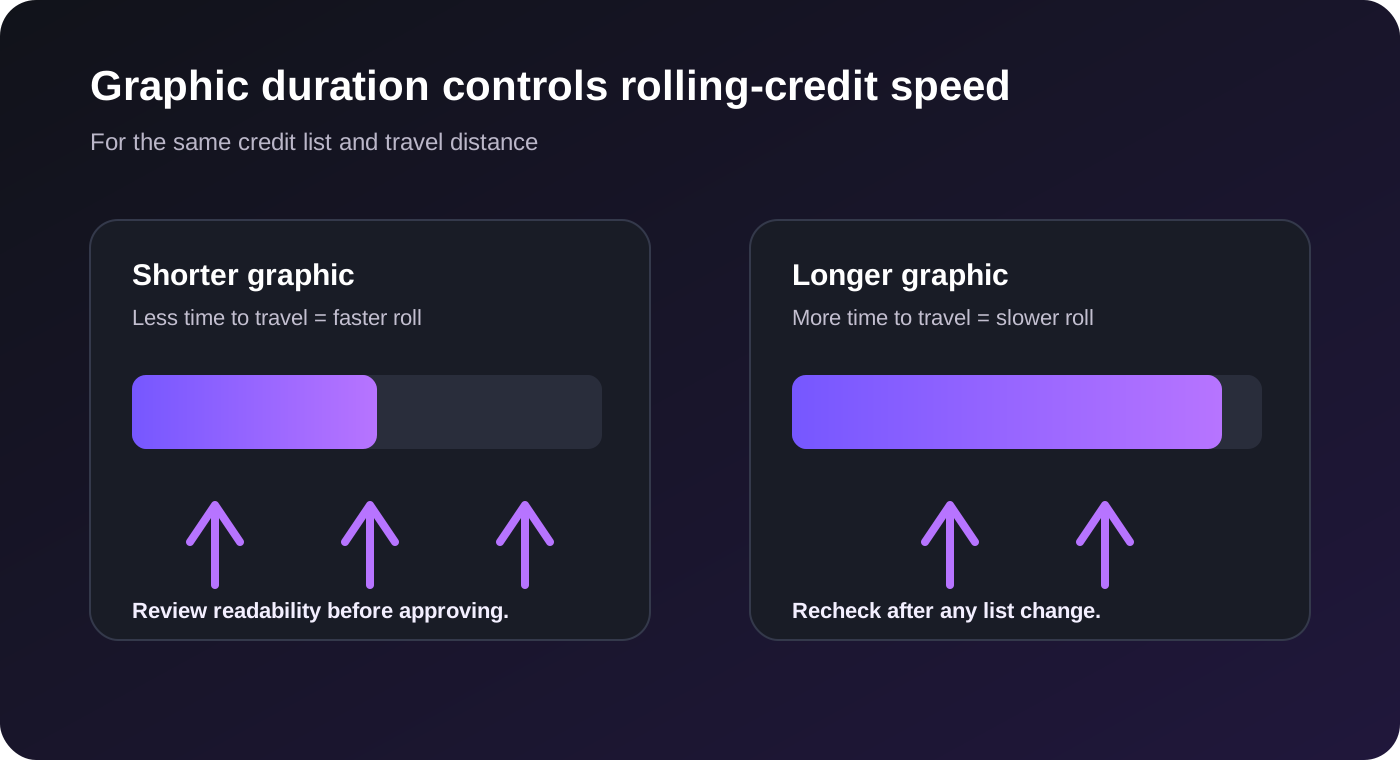
The duration of the graphic clip is one of the main controls over the roll’s speed. For the same amount of text and travel distance, a longer clip generally produces a slower roll; a shorter clip produces a faster one.
Trim or extend the graphic clip in the timeline, then replay the roll from before its first movement through its end. Judge the sequence as a viewer would, rather than by scrubbing. If the list changes, check the duration again because added or removed lines change the total distance the roll must travel.
8. Preview the complete roll
Watch the entire credit sequence at delivery resolution or in the best representative preview available. Check:
- the first and last visible lines;
- long names and job titles;
- department transitions;
- paired columns;
- movement at the chosen frame rate;
- contrast over any background picture; and
- the transition into and out of the credits.
If your delivery specification uses approved title-safe guides or margins, display and check against them. Safe-area expectations vary by platform and delivery specification, so confirm the actual requirement rather than relying on a universal percentage.
Adobe’s current instructions for the Roll controls are available in Create credit rolls in Premiere.
How to Control Rolling-Credit Speed
There is no single correct credit-roll speed for every film, screen, frame rate, font, and layout. Readability depends on several connected variables:
- the amount and height of the text;
- the distance the complete credit block travels;
- the graphic clip’s duration;
- type size, line spacing, and column structure;
- the delivery frame rate and display context; and
- how long individual names remain comfortably readable.
To slow the roll in Premiere Pro, extend the duration of the rolling graphic and preview it again. To make it faster, shorten the duration. Treat this as an iterative readability adjustment, not only a timing target.
A useful review method is to choose a dense representative section, watch it at normal speed, and ask a reviewer who does not already know the names to read several lines. Then watch the entire roll for motion quality and consistency. If a change to the list adds many lines, re-evaluate both duration and motion rather than assuming the previous timing still works.
Do not judge the roll only in a reduced or dropped-frame preview. Render a representative section if playback performance makes the movement appear uneven.
Formatting Credits for Readability
Good rolling credits make relationships easy to understand while the text is moving. They do not need to use one universal design, but they should maintain a coherent system.
Choose a typeface that holds up in motion
Use a typeface with clear letterforms at the intended size and delivery resolution. Very thin strokes, tight counters, or elaborate details can become difficult to read once the text moves. Test real names—including long names, accented characters, and mixed capitalization—rather than judging the font from a department heading alone.
Build a consistent hierarchy
Department headings, roles, names, acknowledgements, and legal lines should not compete equally. Use restrained differences in size, weight, spacing, or alignment to show structure. A viewer should be able to tell whether a line is a department, a role, or a person without stopping the roll.
For more examples of structure, cards, columns, and department treatment, see the film end credits format guide.
Use spacing deliberately
Line spacing affects both readability and total roll length. Too little space makes names blend together; too much space increases the travel distance and may force a faster roll to meet the same duration. Keep equivalent items consistent and use larger breaks only where the hierarchy calls for them.
Check alignment and columns with difficult entries
Role/name columns can be efficient, but they are vulnerable to long text. Test the longest job title and longest approved name. Decide how those entries should wrap or whether the layout needs another treatment. Do not fix isolated collisions with arbitrary spaces that will break when the text changes.
Maintain sufficient contrast
White text on black is common, but it is not mandatory. Whatever the design, the moving text must remain distinguishable from the background. If the roll appears over picture, test the busiest and brightest portions of the underlying shot, not only one clean frame.
Respect the delivery context
Check the roll in the intended aspect ratio, resolution, frame rate, and display environment. Confirm any platform, broadcaster, distributor, accessibility, or client-specific requirements with the responsible delivery team. Design preferences are not substitutes for a delivery specification.
For a complete worked reference, compare the layout with the annotated short-film end credits example.
Common Premiere Pro Credit Problems
| Problem | Likely cause | Practical fix |
|---|---|---|
| The Roll option is missing | A text or graphic layer is still selected in the Program Monitor, or the graphic clip is not the active item | Deselect individual layers, select the graphic clip in the timeline, and return to the Properties panel |
| Credits move too fast | The clip duration is too short for the amount of text and travel distance | Extend the graphic clip, then preview the full roll at normal speed |
| Credits move too slowly | The clip duration is longer than the sequence needs | Shorten the clip carefully and check that dense sections remain readable |
| The first or last lines appear abruptly | Offscreen start/end behavior or preroll/postroll timing does not match the transition | Review the start/end-offscreen options and adjust Preroll or Postroll |
| Names or roles are clipped | The text block, column width, or graphic bounds are too narrow | Check the longest entries, adjust the layout, and inspect the entire document view |
| Spacing becomes inconsistent | Manual spaces, tabs, or one-off line breaks are being used as layout controls | Rebuild the hierarchy with a consistent text and column system before continuing |
| Motion looks uneven | Preview performance, frame-rate conversion, or the movement itself may be causing the issue | Render a representative section, review at delivery frame rate, and test Soften only if it improves the intended motion |
| A small revision breaks the layout | The credit list and presentation are being maintained as one manual text block | Correct the authoritative list first, then reflow and recheck the affected layout and timing |
| A very long list is difficult to navigate | One graphic contains a large amount of unstructured text | Organize the source by departments and sections; consider a structured credit-management workflow |
Managing Large Credit Lists and Revisions
A five-line credit card and a feature-length roll are different production problems. With dozens or hundreds of names, accuracy and change control become as important as animation.
Typical late-stage changes include:
- corrected spelling or diacritics;
- updated role descriptions;
- a person moving to another department;
- a new acknowledgement or music line;
- contractual placement changes;
- removal of a duplicate credit;
- a change that alters column width; and
- client notes arriving after a review render.
If the only source is a formatted text block inside Premiere, every correction can affect layout, total height, speed, and sometimes more than one version of the sequence. The safest approach is to maintain one approved source list outside the presentation, log revisions there, and regenerate or update the roll from that source.
Premiere Pro can still be the correct tool when the design is highly customized or the list is manageable. The goal is not to avoid Premiere; it is to keep credit data, layout, and final editorial assembly from becoming one fragile manual task.
Where ScrollX Fits
ScrollX is a professional end-credit creation platform designed around structured credit data. It is intended for editors, assistant editors, post supervisors, coordinators, and finishing teams working with large lists, frequent revisions, and repeated renders.
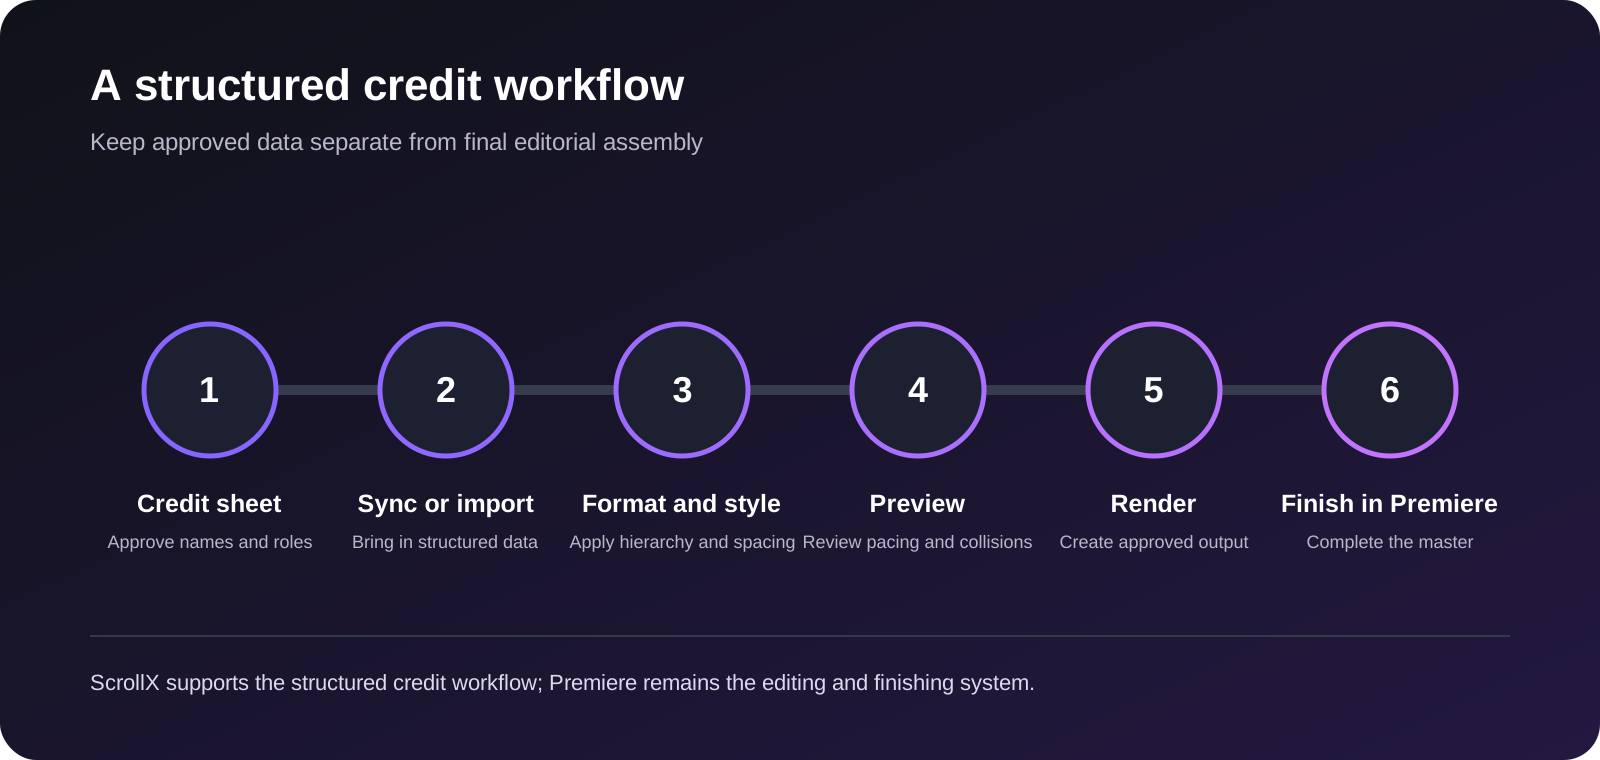
A typical ScrollX workflow is:
- Credit sheet — collect and approve names, roles, departments, acknowledgements, and other required lines.
- Sync or import — bring the structured credit data into the credit workflow.
- Format and style — apply consistent hierarchy, spacing, and layout.
- Preview — review the complete roll for accuracy, pacing, and collisions.
- Render — create the finished credit output.
- Finish in post — place that output in Premiere Pro or another editing/finishing system and complete the master.
ScrollX is useful when the production needs:
- a structured source for a large cast-and-crew list;
- consistent treatment across departments;
- repeated spelling, role, or placement revisions;
- previewing before final output;
- repeat renders from an updated list; or
- a credit-specific workflow that remains separate from picture editing.
The professional rolling credits generator focuses specifically on moving credit rolls. Premiere remains responsible for the final edit, transitions, picture, sound, and delivery master.
Premiere Pro vs ScrollX: When to Use Each
| Workflow situation | Premiere Pro | ScrollX |
|---|---|---|
| Small, simple credit list | Direct manual creation works well | Also possible, but may be more workflow than the project needs |
| Highly customized motion design | Strong choice inside the edit; After Effects may also be appropriate | Not the main purpose |
| Hundreds of names | Possible, but list and layout management becomes more manual | Structured credit-data workflow |
| Frequent revisions | Each change may require manual text, layout, and timing checks | Designed around updating and rerendering structured credits |
| Spreadsheet-based approvals | Spreadsheet remains an external source that must be transferred and checked | Credit-sheet data is part of the workflow |
| Repeat renders | More hands-on version management | Designed to create repeat outputs from revised credit data |
| Final picture and sound assembly | Core Premiere responsibility | Finished credits are brought into the post-production workflow |
Neither tool is the universal winner. Use Premiere directly when the roll is simple or needs tight editorial and motion control. Use ScrollX when the production challenge is primarily credit-list scale, structure, approvals, consistency, and revisions. Many professional workflows can use both.
For motion-design-specific control, see How to make rolling credits in After Effects, which covers Position keyframes, expressions, precomps, typography, and rendering.
For a finishing workflow in Blackmagic Design’s editing environment, see the DaVinci Resolve rolling-credits workflow.
Final Pre-Render Checklist
Before approving the credit roll, confirm:
- Every on-screen name matches the approved spelling, capitalization, and diacritics.
- Every role and department is correct.
- Cards, department order, acknowledgements, music, and legal lines match the approved sequence.
- Contractual, guild, distributor, and client requirements have been checked by the responsible production owner.
- No duplicate, omitted, or outdated credits remain.
- The longest names and roles fit without collisions or unintended wrapping.
- Font, hierarchy, spacing, alignment, and contrast remain consistent.
- The roll is readable at normal speed in the intended delivery context.
- Start/end behavior, Preroll, Postroll, and any easing are intentional.
- Margins or title-safe requirements match the delivery specification.
- The latest approved revision is the version being rendered.
- Resolution, frame rate, duration, and codec/output settings match the finishing workflow.
- The exported credit roll has been reviewed after it is placed in the final sequence.
Answers to Common Questions
Can Premiere Pro create rolling credits?
Yes. Premiere Pro can turn a text graphic into a vertical credit roll using the Roll option in the Properties panel. It is a practical choice for short or moderately complex sequences and remains the system used to assemble the final edit.
What is the easiest way to make long film credits?
Begin with one approved, structured credit list. For a relatively short list, paste and format it in Premiere and use the built-in Roll controls. For a large, frequently revised list, a dedicated platform such as ScrollX can manage the structured data and renders before the finished roll is placed in Premiere.
How do you slow down rolling credits in Premiere Pro?
Extend the duration of the rolling graphic clip, then preview the full sequence at normal speed. The amount of text and total travel distance also affect the result, so recheck the speed whenever the list changes.
How should film credits be organized before editing?
Use one authoritative list containing approved names, roles, departments, sequence, special cards, acknowledgements, and required legal or music lines. Confirm the final order with the production’s authorized credit owner before styling the roll.
What is the best workflow for large credit lists?
Keep the credit data separate from the presentation: collect and approve a structured sheet, format and preview the roll, apply revisions to the source, render an approved output, and then place that output in the finishing timeline. This reduces the chance that a manual layout becomes the only record of the credits.
Can I create end credits from a spreadsheet?
Yes, a spreadsheet can be the source of truth for names, roles, departments, and approvals. In a direct Premiere workflow, the approved text is transferred and formatted in a graphic. ScrollX uses structured credit-sheet data as part of a specialized credit workflow, making it easier to update and rerender large lists before finishing in Premiere.